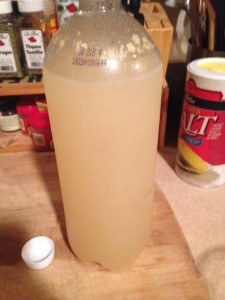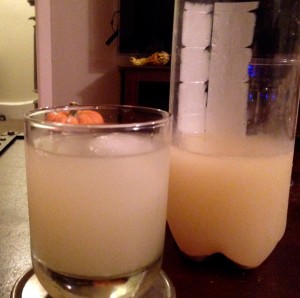
 The best feeling in the kitchen is when something comes out so well it’s surprising. I had that feeling while unscrewing the cap on my first bottle of homemade ginger beer. Before I had even taken a sip, I could see the tiny bubbles filtering up through the opaque liquid. Even if it didn’t taste right I had carbonated a beverage using only the power of yeast, sugar, and water. Lucky it also tasted good–maybe not as strong in flavor as I would have liked but the burn grew the lower down in the bottle I went.
A few months back I was doing a road trip through the Midwest with some friends. When we stayed with a couple in Chicago the lovely lady of the house was in the process of starting to brew some ginger beer. I had never thought of doing that but it sounded cool. After talking to her about it she kindly sent me on my way with some champagne yeast to help do the job. The yeast sat about in my kitchen for a good while until I started reading Proof: The Science of Booze (a must read for any one who is at interested in science and drinking). The description in the first few chapters of the magic and history of fermentation made me need to try it myself.
—-
I had misplace the printed instructions my friend and given me and so took to the internet and found this:
Ingredients
2 1/2 cups (600 milliliters) warm, filtered (or pre-boiled) water
1 1/2 teaspoons champagne yeast (the everything store has it)
Freshly grated ginger
Granulated sugar
Juice of 2 lemons
1 jalapeño, sliced (optional–I didn’t use, but will on a next go)
1 large glass jar
2 to 3 clean plastic soda bottle
Directions (with my own take):
The first step is making a “plant” for the ginger beer. In a glass jar stir the yeast into the water until dissolved. Add in 1 tablespoon freshly grated ginger, 1 tablespoon sugar, the lemon juice, and the sliced jalapeño, if you’re using it. Stir to combine. (The jalapeño supposedly gives the ginger the burn–I didn’t use it and got some burn, but not as much as I would have liked). Cover the jar with a cheese cloth a rubber band. Place the jar in a warm place.
Every day for the next week you’ll have to feed the plant. Each day add a tablespoon of grated ginger and a tablespoon of sugar. Stir until the sugar dissolves, then replace the cloth and put back in a warm place. Don’t worry about being exact at this phase. After week there should be bubbles of a foam on top of the liquid. If you want a stronger flavor keep the plant going longer. The next step is bottling. I used a two liter bottle and a one liter bottle.
Use plastic bottles. Again: use plastic bottles. The pressure can really build up from the fermentation. If you use glass it could explode.
Using a cheesecloth, strain the plant out into a large measuring cup or bowl.
Fill the bottles two thirds of the way with water, use a funnel to add sugar, and shake to dissolve the sugar into the water. Add about a cup of the plant liquid to each clean, dry soda bottle — more if you want your ginger beer stronger, less if you want it less intense. Stir with a chopstick to combine. In adding half the mixture to a one liter and half to a two liter I could taste the extra strength in additional plant in the bottle.
Seal the bottles tightly with their caps and put them back in the a warm place. Every 24 hours, squeeze the bottles to test how they’re carbonating. When they feel like a rock and are impossible to squeeze at all, slowly start to unscrew the cap just until you hear hissing, but do not open it all the way. Let out some of the carbonation, then seal it back tightly.
After about two weeks of bottle time the magic of fermentation should have happened–that sugar will now be booze and it’s time to enjoy. Add more sugar or lemon juice if the ginger beer needs it. Then drink it on the rocks or make your self a Moscow Mule or Dark N’ Stormy. Just make sure you finish the bottle in a few hours–it goes flat fast.
—-

 Follow